Video:
Here is the video. If you can’t see it below, you can watch it directly on YouTube.
Materials:
- A sparkling clean wineglass filled with water mixed with holi powder or food coloring
- Any DSLR / Lens combinatiin (You can use any lens, but I would stay away from wide-angle lenses for this).
- Paul C Buff Einstein E640 Strobe with the “giant” soft-box attached (again, you can use any light/light modifier you want, but something that flashes will give you the cleanest result. The LP180 is a good alternative).
- Paul C Buff Einstein E640 Strobe with 7″ cone reflector attached aimed at the background. 2 blue gels are attached to the reflector by a small lightweight plastic clamp.
- PocketWizard Mini TT1 + AC3 Zone Controller (for Nikon, Canon versions are available too) on my camera’s hotshoe. This wirelessly triggers the flash and adjusts the flash power. You could use a Flex TT5 instead of the Mini TT1. Flex TT5s can also be attached to the foot of portable speedlight flashes to receive the signal.
- Power MC2 plugged into the Einstein E640 strobe (The Power MC2 receives the wireless signal from the Mini TT1)
- RFN-4 Wirelesss Shutter Release – this allows me to wirelessly release the shutter on my camera, so I can take pictures without having to physically be behind the DSLR.
Cheaper Alternative set-up:
- The strobe can be replaced with an unused $200 LP180 speedlight, or even something like a used speedlight for ~$50 – the only difference is that you might need to raise the ISO and widen the aperture a bit, depending on how bright the speedlight is.
- The fancy PocketWizard wireless trigger system can be replaced with the RF-603 trigger for $37. I am pretty sure these can be plugged into any strobe by using the PC Sync or audio jack port, as that is what I did with the older RF-602. I even sort of think the RF-603 are more responsive than the PocketWizards! Sometimes, for whatever reason my PocketWizards don’t want to respond and it can be frustrating. The RF-603 is smaller too.
- Then, optionally, you could get a cheap light stand and umbrella for another $20-$40 (but you could probably get by without this, depending on what you are trying to do/photograph).
The cheaper set-up is the stuff I have been using all this time until recently (and still do use it). Remember, I took this shot with all entry-level equipment and it came out great. The flashes had to be close to the subject and have no light modifiers on them, but the shot still looks pro, and I was able to use 1/32 flash power (flash duration is super short, probably shorter than any given strobe, including the E640), and ISO100, F16 (ideal settings)!
Ideas:
- You could experiment with different densities of liquid, and then drip a different color to each density, so it looks like a rainbow is flying out of the wineglass.
- You can also just throw the wineglass up in the air, but you will need to be sure that it lands on something soft. I would recommend having it fall on an elevated sheet. Spinning it in a spiral could be interesting.
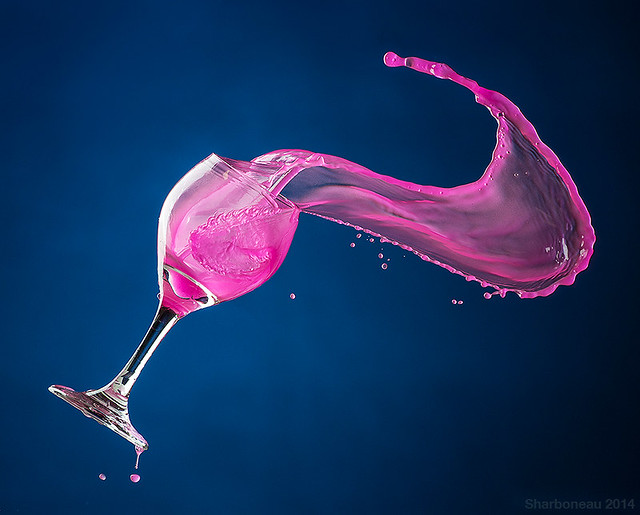
Final Image:
Check This Out Next:
If you liked this video, sign up to the e-mail list in the upper right corner of this site. Also consider checking out my photography course Trick Photography and Special Effects (meant for anyone interested in creative techniques) and Photography Masterclass (meant for beginners wanting the essential, universal, industry-standard information to get started; this course will show you how to use a DSLR, lighting, composition, and Adobe software).
