
YOU WILL NEED:
- A digital camera
- A tripod or flat surface
- Photoshop
STEPS:
- Put your camera on your tripod and face it towards your subject
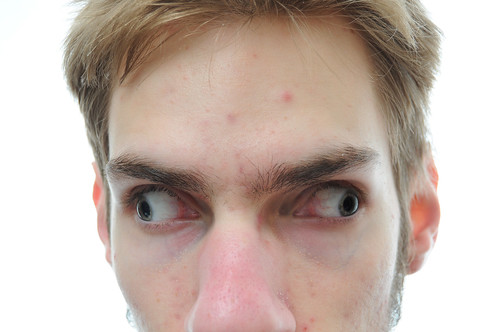
- Take two pictures in Manual mode, one with your eyes looking up and one with them looking down. Keep your head as still as possible.
- Open up your photos in Photoshop and stack them on top of each other as layers.
- Next, create a Layer Mask on the top layer, select a black soft brush, and paint over an eye.
- Your done!
If you found this useful, you can always submit your results to the PhotoExtremist Flickr Group so others can see 🙂
Have fun!
<object width=”425″ height=”344″><param name=”movie” value=”http://www.youtube.com/v/UZ-kXQwJJkY&hl=en&fs=1″></param><param name=”allowFullScreen” value=”true”></param><param name=”allowscriptaccess” value=”always”></param><embed src=”http://www.youtube.com/v/UZ-kXQwJJkY&hl=en&fs=1″ type=”application/x-shockwave-flash” allowscriptaccess=”always” allowfullscreen=”true” width=”425″ height=”344″></embed></object>

1 Response to Bug Eyed Photography Tutorial