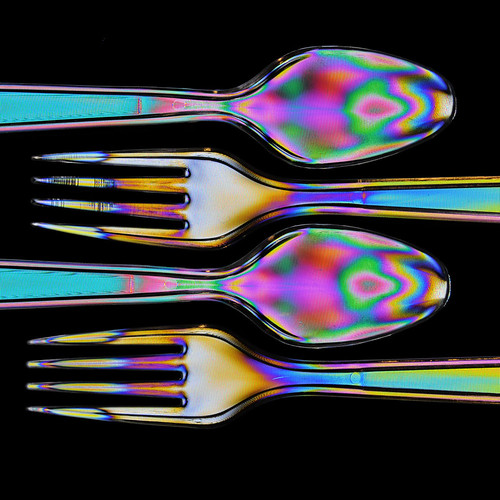
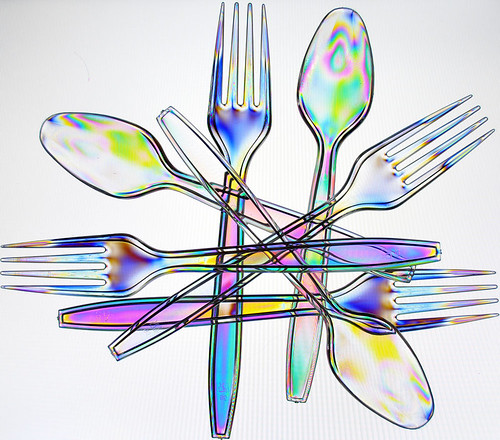
Photoelasticity Birefringence is a visual phenomenon that occurs when placing transparent plastic between polarizing material. The effect shows the stress contained in the plastic.
In order to take pictures like this, you will need to place a hard transparent plastic object between two polarizers. Make sure your object is backlit as well. Fortunately, LCD computer monitors are backlit AND have a linear polarizing material in front of the backlight, so this takes care of everything. If you go this route, all you need to do is find some cool looking plastic and stick a polarizer filter on your lens and you are set to go. If you don’t want to use a laptop computer screen or just want to to get rid of the ugly RGB pixels, use a light table with polarizing paper on top of it instead.
You’ll also want a polarizing filter to place on your lens. This can be circular or linear, it doesn’t matter. Things that work well are cheap transparent plastic cups, forks, spoons, and knifes. Prisms, plastic wrap, and cheap packaging material work good as well. Things that unfortunately don’t work are water, glass, and anything that isn’t a transparent plastic (crystals might be the only exception, although this is unconfirmed). Water can sometimes look okay-looking, but not nearly as cool as plastic.
Additional Resources:
http://en.wikipedia.org/wiki/Photoelasticity
http://en.wikipedia.org/wiki/Birefringence

7 Responses to Photoelasticity Birefringence Photography Tutorial