In this article I’ll explain how you can easily clone yourself with a camera and Photoshop. People call these “multiplicity photographs”. When this technique is used in sports, it is known as “sequence photography”. If you find this subject interesting, I would reccomend getting my Trick Photography and Special Effects eBook.
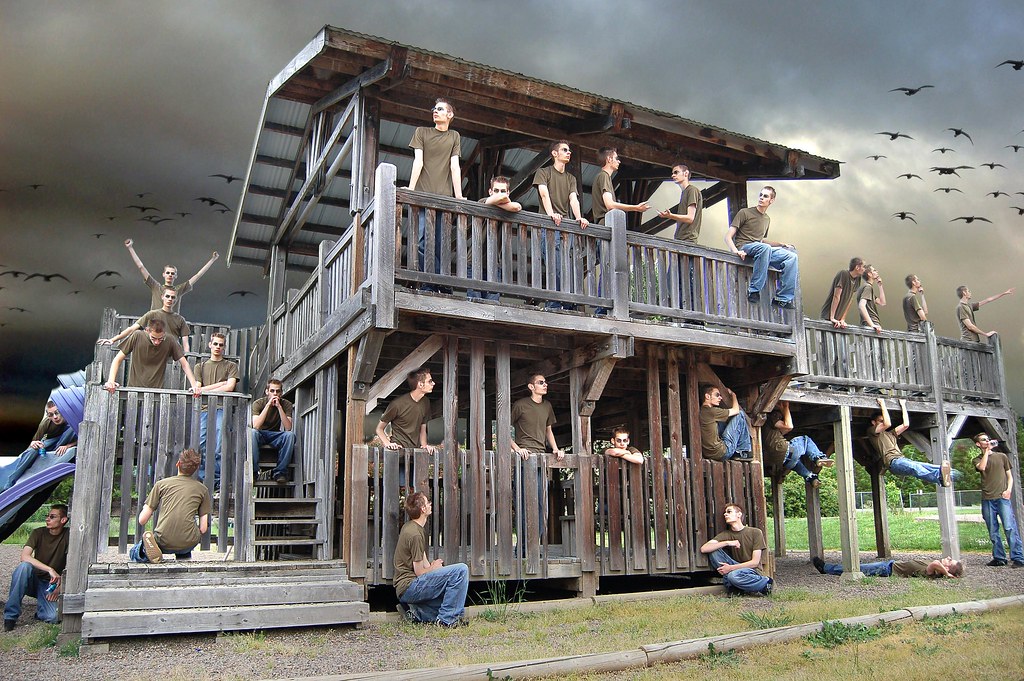
"Imagination" - I had my mom take these, every time I got into a new position I told her to take a new shot. It went by quick and easy. I replaced the sky with a more dramatic one and added birds. I also did some dodging and burning on the play structure.
OKAY. So, here is how you do it. Put your camera on a tripod and tighten it so it won’t move. Focus your scene and then switch to Manual focus so that your camera won’t constantly be trying to re-focus the scene. You can shoot in any mode you want to, but I would advise against Shutter Priority mode and just take the photos in full Manual mode or Aperture Priority mode. This insures that each frame will have a consistent exposure and your aperture locked in. After everything is in focus and you have your shutter speed and aperture set, take a picture of the scene with the model to the left of the frame. Then, take another picture of the model closer to the right of the frame. Keep taking pictures with the model’s body in different areas of the frame.
You can get a friend to help you take each picture, use a remote, or use the self timer feature on your camera. If your friend is pushing down the shutter button on the camera, make sure they are careful on keeping the camera perfectly in place and not to accidentally bump into it.
Now once you have all your photos taken, you need to import them into Photoshop. Click File > Scripts > Load Files into Stack…. Then just select your images and wait a minute for them to compile.
Once it’s done you should see all your pictures in the Layers window. Select the top layer and click New Layer Mask (it’s located at the bottom of the layers window) Next, take a black brush and brush over the person in that frame. The person will seem to be erased, but to un-erase it, hit CTRL+I, (cmd+I if you are on a Mac). You can now see the person in the first frame, as well as the one in the second frame! Make a layer mask like that for all the frames and then your done! You can also do this with objects and animals, and skateboarders, etc.
There is also a piece of software that can automate this entire process for you called Aqiplicity. I tried using it once, but the results were not perfect. It’s worth giving it a try though. You can view your image in the free version but the saving option is disabled. It’s $10 for the full version.
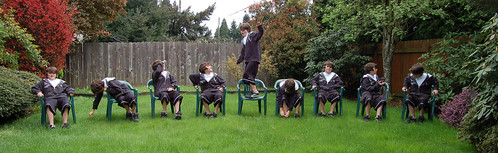
This image was very easy to create because none of the people were overlapping each other. This made it very easy to mask the model without tediously going into fine detail
If you would like to see some spectacular examples using this photography technique, take a look at the 20 Stunning Examples of Multiplicity Photography!


56 Responses to Multiplicity Photography Tutorial