If the above video is not displaying properly, you can watch the YouTube video tutorial here.
A multiple exposure is where you take two images on top of one another. This used to be achieved in the days of film, where you would take one picture and then instead of advancing the film strip to the next frame to take the next picture, you would simply leave the film in the same place and take another picture right on top of it. Taking or editing the shots in Black-and-White usually produces the best results because you don’t have to worry about color theory or anything like that – black and white just works.
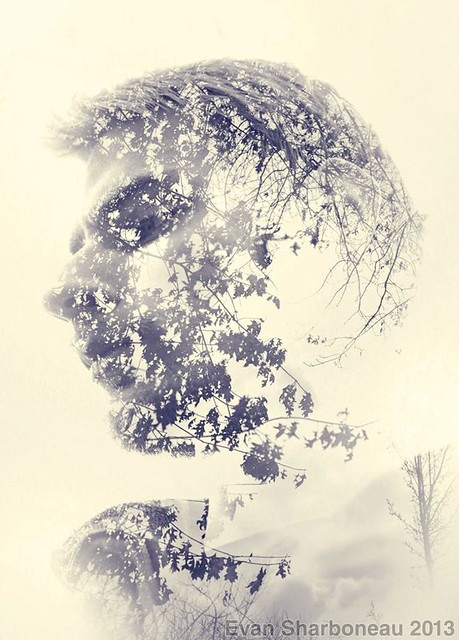
Here are the steps to take high-key double exposures just like the one above. You can skip steps 3-6 if you are taking regular, non-high-key double exposures:
- Turn on the Multiple Exposure feature on your camera.
The Multiple Exposure feature is located in different areas of the menu system for every camera – use your intuition, check your camera’s instruction manual, or Google search to find where it is located.
Here is a list of cameras that a have Multiple Exposure feature.
You can scroll horizontally on that page to see all of them. Most higher end Nikon DSLRs (D300s and D800 for example) have the multiple exposure feature in the camera’s menu system. - Turn Auto-Gain OFF, if possible. Auto-Gain automatically attempts to neutralize the EV, which isn’t useful for the high-key nature portraits.
- Put your camera in Aperture Priority Mode and then select your F Number (I used ~f/4).
- Put your camera in Spot Metering Mode.
- For the first shot, center the Auto-Focus Point and take a picture of yourself. The background should be as close to 100% white as reasonably possible. You can achieve a white background by having the sky fill up the background behind your head (having the sun directly behind your head and lined up with the lens will produce the best result. Light overcast days are theoretically ideal, but not necessary.) Using flashes against a white wall to create a silhouette also works.
- For the second shot, bump up the Exposure Compensation to around +2 EV and take a picture of whatever you want (I like trees with leafs on them) and make sure the background is 100% white for this image as well. I would recommend experimenting and taking each shot by themselves to see which settings you need to use in order to get the background to be 100% white for each individual shot, +2EV is only an estimate and is only what I was using on that particular day, all situations are different.The key is to just get the background to be white and not gray – use whatever settings necessary.
- After you have taken two shots, they will automatically stack and should show up in your LCD screen (you can’t retrieve the original individual images if using a Nikon DSLR). You can then continue to take more and more double exposures until you get a really good one – I took dozens if not ~100. Some cameras automatically turn off the multiple exposure feature after you have taken one multiple exposure – if you find that this is the case for your camera, simply turn the multiple exposure feature back on before you take your next set. The Nikon D800 has an option to leave the multiple exposure function on all the time, making things a little faster. The D300s does not.
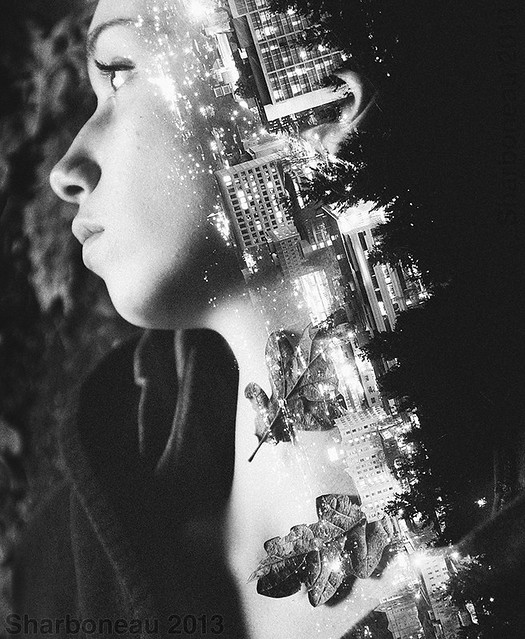
If you want to use previously taken shots, or don’t have a multiple exposure feature on your camera, you can do this in Adobe Photoshop (The image above was done in PS). Here are the steps:
- Create a new Photoshop document and drag and drop 2 images into the Photoshop document so the two images show up in the bottom right in the Layers Palette as 2 layers.
- Select the top layer, and then select “Screen” for its blending mode. You also can try experimenting with “Multiply” (The Multiply blending mode will darken instead of lighten).
- (Optional) You can Dodge Highlights by using the Dodge tool to whiten up anything that didn’t turn out to be 100% white.
- (Optional) You can adjust the Curves of the image by raising the left-most lower point upwards vertically a little bit, and/or the right-most upper point down vertically a little bit; You can apply the same adjustments to individual color channels in the same Curves adjustment window as well (Red, Blue, Green).
- File > Save As 8-Bit JPEG.
After you have created your images, post them in the PhotoExtremist Flickr Group or the PhotoExtremist Facebook Page! Be sure to tag them with “multiple exposure” and/or “double exposure” so we know what we are looking at and can search for them in the future!
 If you enjoyed this video and article on multiple exposures, I highly recommend my e-book and video series Trick Photography and Special Effects which has over 300 e-book pages and 9 hours of instructional video content focusing solely on universal creative photography and Photoshop techniques just like this one.

Pingback: Create a Multiple Exposure Photo in Photoshop
Pingback: Create a Multiple Exposure Photo in Photoshop | Photoshop Roadmap
Pingback: INTRO! and a tutorial! | Photography tips and tricks
Pingback: FMP research | reddjinn
Pingback: FMP | 83reddjinn
Pingback: “The man who cannot visualize a horse galloping on a tomato is an idiot.” André Breton | Photography Movements