In order to make an orb, you’ll need some battery operated fairy lights, speaker wire, electrical tape, and a functional arm to spin it with.
I recommend getting white LEDs because you can change the colors of them at any time by taping some Roscolux colored gels over them.
Once you’ve got some fairy lights, cut the two wires and extend them using speaker wire. Watch this video tutorial by TxPilot to see this process being done in real time.
Now that you have your orb tool, you are ready to start taking the light painting photo. Set your camera up on a tripod and use manual mode with auto-focusing off.
The specific camera settings you need to use will always vary – it all depends on how bright the fairy lights are in relation to the environment they are being photographed in. Sometimes I take one photograph with the camera settings adjusted for the landscape and then another separate photograph with the settings adjusted for the orb and then combine them in Photoshop by placing both of the images in a Photoshop document as layers, and then selecting “Lighten” or “Screen” as the Blending Mode on the top layer.
Disco Planet by ~Vlue on deviantART
This was photographed in my front yard at night. With a 30 second exposure taking place, I used a large flashlight with large colored gels over it to light paint the tree, foreground, and even background. After that, I combined the photos in Photoshop using Lighten as the blending mode for all of the layers.
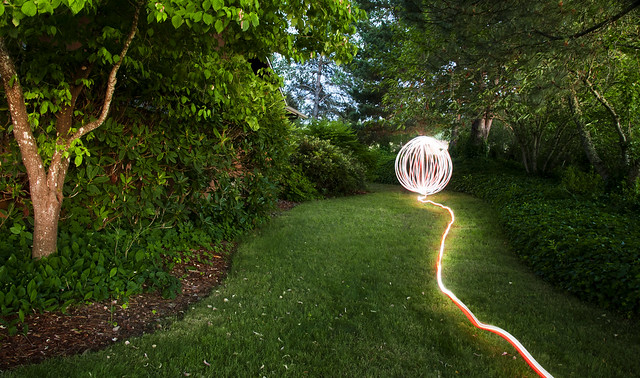
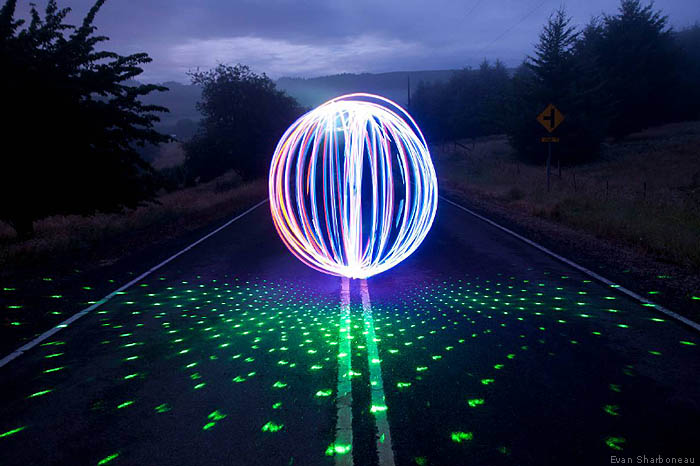
This was photographed at 4:08 AM on July 15th, 2011. If you wake up early enough to catch the early dawn or late dusk light, you can get both the orb and the environment properly exposed in the same shot without the need to combine the shots in Photoshop. Your next best bet after dawn/dusk light is to use moonlight. A full moon on a clear, cloudless night works best. You can literally capture photos that look like they were taken in the day time if you use the right camera settings to make the picture brighter (lengthening the shutter speed, raising the ISO value, and/or lowering the F Number).
There are a few more orb photos I made that can be found on the Photo Extremist Facebook page.
And of course, for a collection of orbs created by light painters on Flickr, check out the Orbs group.
Shout outs to TCB for making the original video that showed me how to do this and TxPilot for making the orb tool tutorial.

Pingback: Orbs (Light Painting)
Pingback: Light Painting | Kimberly Clark Photography
Pingback: daytime long exposure photography tutorial « Learn photography
Pingback: Video Tutorial – ph0toworkshops
Pingback: 10 Best Tutorials To Master Light Painting in Photography - Tutorials Press