In this digital photography and Photoshop tutorial, you will learn how to capture a photo using grids and gels on flashes to get the proper lighting. We will then go into the Adobe Photoshop software program and create the glowing lines and smokey cloud in front of the luminous face.
Push the play button on the video player below to start watching the tutorial – I recommend watching it in Full Screen so you can see the text when I am in Adobe Photoshop.
If you can’t see the video player below, you can watch it directly on YouTube (opens in new tab/window).
.
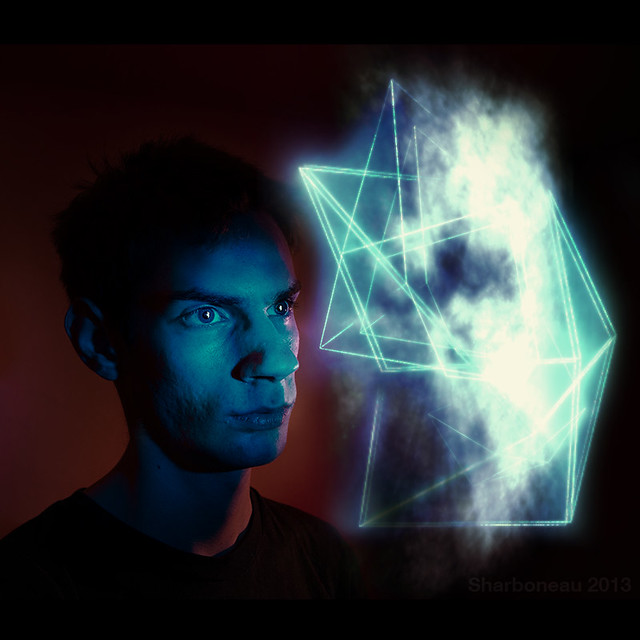
This is the newest image I’ve made with abstract glowing lines.
.
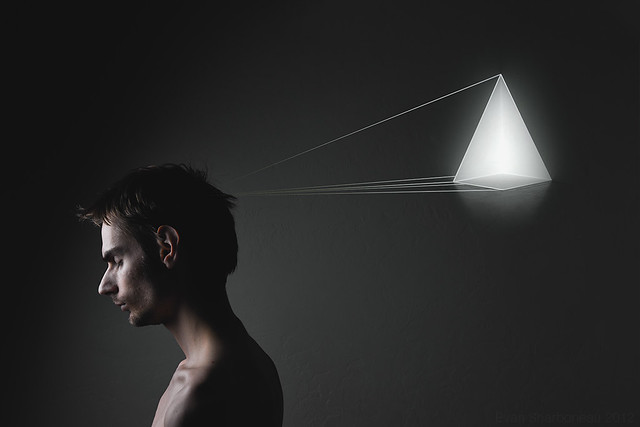
This was the first image I created that made use of geometric abstract glowing lines.
.
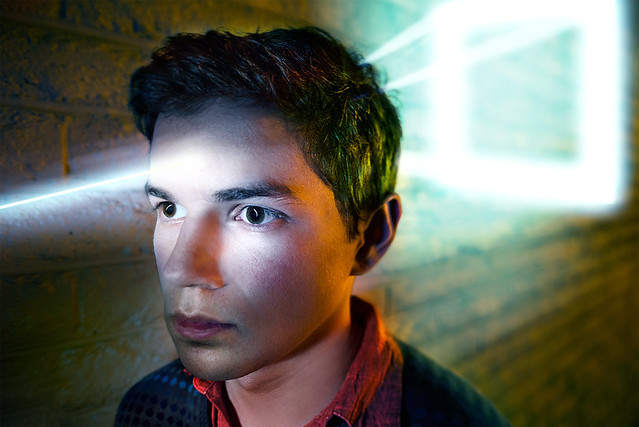
This image was made after the first one; my friend (the model) got the idea to make the original concept above more three-dimensional by taking the shot at an angle. We spent hours in Photoshop making the lines, perfecting the skin, removing harsh shadows, dodging and burning, and making the colors vivid. There is a before-and-after image here.
.
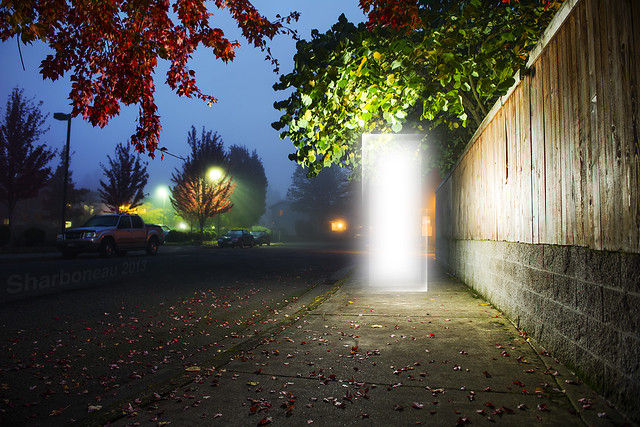 This one wasn’t made with the pen tool to create lines, but instead the rectangular marquee tool was used to create two rectangles filled with white on two separate layers, then I deleted portions of the two rectangles and added a glow to match that of its environment (it was a really foggy morning). The original lighting source in the scene was deleted using layer masks.

Pingback: unbiassed|my student's|acquire|my own engagement ring|the
Pingback: descriptions|brand names|such as