That is the moon, not the sun! Make: NIKON CORPORATION Model: NIKON D50 Shutter Speed: 300/10 second Aperture: F/3.5 Focal Length: 18 mm Date Taken: Sep 7, 2009, 12:32:58 AM
Taking Long Exposures At Night:
Taking photographs at night doesn’t mean they have to look like they WERE taken at night. The moon is exactly like the sun in terms of lighting, only a lot dimmer. Which means you can take a picture at night when the moon is out, and if you use the right settings, the moon will look just like the sun. I had my camera over exposed 2 stops for this picture. The shadows (and their angles) seem to be more intense at night than day.
Why you would want to take a long exposure when using the moon:
- To get lighting at a different angle than the sun regularly provides
- The decrease your depth of field, so you can use smaller apertures, like f/1.4
- to take longer exposures, so you can see cloud motion blur
If you want to take a long exposure at night time, have your ISO set to the lowest setting (like ISO 200), and then put your camera on Shutter Speed mode. On my camera, the camera can go up to a maximum of 30 seconds, so I used that. If you need even longer exposures, keep taking 30 second exposures one after the other, and then blend them together in photoshop using the Lighten blend mode. Or, if you wanted to go more extreme, put an ND filter on your lens, and take a 1 hour exposure 😉
If you simply want to take short exposures at night time, use a higher ISO, like 1600, and the time will be much shorter to take the picture. You will still need a tripod, and the exposure time will still be longer than if you were to take the picture during the day.
Taking Long Exposures During Day:
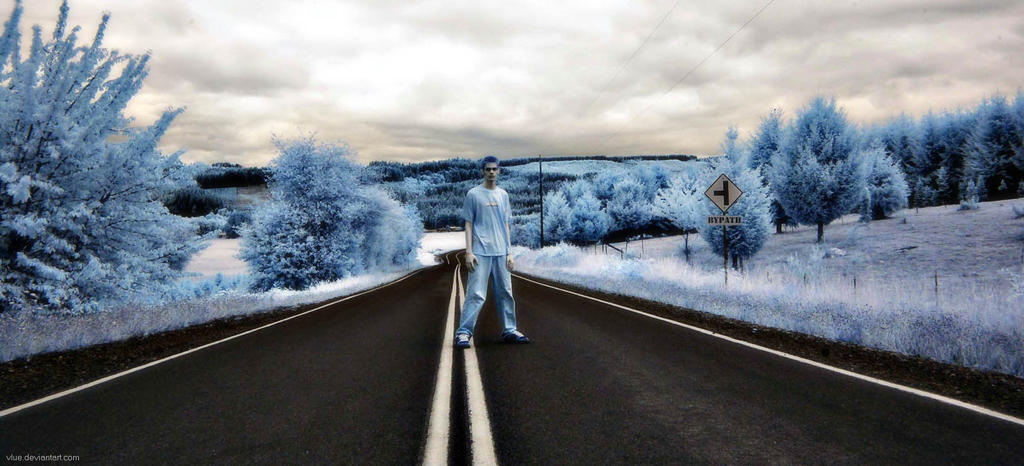
In order to take long exposures during the daytime, you need to have very dark filters for your lens. The two filters that I recommend using are the ND400 and the Hoya R72. The ND400 is a filter that basically blocks A LOT of light, enabling the photographer to take long exposures (30 seconds+) in daylight. The Hoya R72 is an infrared filter that also blocks a lot of light. The r72 will not give your picture original colors though, since it is in infrared. Here are some examples of what infrared pictures look like:


As you can see, they are quiet different than normal colored photographs. Not all cameras sensors are compatible with infrared filters though, so google your camera name and model along with the term “with IR” beside it. The older Nikon cameras, like D50 and D70 are compatible with the IR filters.
If you want to take regular SHORT exposures with infrared, you can get your camera modified by LifePixel. Your camera will permanently take infrared pictures at regular shutter speeds.
