The following content is an excerpt from the Trick Photography and Special Effects eBook. For additional content on IR Photography that has been reorganized, updated and revised, please consider getting the eBook.
These are infrared images; pictures with recorded light beyond the visible spectrum. You can take infrared photos by using an infrared filter that screws on the front of the lens, or you can convert your camera to take IR photos permanently.
Why Take Infrared (IR) Photos?
Infrared photography darkens clear blue skies a lot, but leaves the individual clouds very bright. Infrared photography leaves foliage (grass, plants, leaves) looking bright white. It allows you to take photos with longer shutter speeds, and gives your photos an awesome look in general.
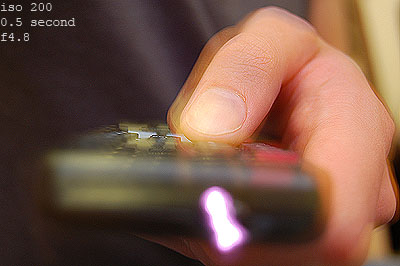
Nikon D50. ISO 200, 1/2 second, f4.8. This camera is very sensitive to IR light 🙂
Can my camera take IR photos?
Older Nikon cameras, like the Nikon D50 andD70 work very well with the Hoya R-72 Infrared Filter
. However, a lot of newer camera sensors now have a filter that blocks out IR light in front of the cameras sensor (to a degree). In order to find out if your D-SLR can take infrared photos, find a remote control that goes to your TV, or something similar. Take a 1 second exposure. During that exposure, click the power button on your remote, pointing it towards the camera lens. When you look at the picture on the LCD preview screen, you should see a light coming from the front of the remote. If the TV remote light looks very dim, the exposure time will have to be longer when using an IR filter. BUT, if the TV remote light looks pretty bright, your camera is well suited for infrared photography. Try doing this test with different lenses as well; some are better for IR photography than others. If you don’t see anything coming from your remote, you won’t be able to take infrared photos with your camera using an IR filter. You can however, get your camera’s sensor modified by LifePixel. Conversion costs about $300-$500, and shutter speed times are normal, as is focusing. Your camera will be permanently modified for infrared photography!
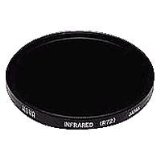
But, if your camera passed the TV Remote Test, then you can go the easy/cheap route and start taking infrared pictures with the Hoya R-72 Infrared Filter. Mine was $54 for a 52mm sized filter.
Some lenses just don’t work that great with IR filters and create hotspots. I myself however haven’t had any problems with “hotspots” in any of my photogs before.
Here is a list of cameras and lenses that are good for IR:
Good/Bad Infrared Lenses List
Good/Bad Infrared Camera List
Taking Infrared Photos Using the Hoya R72 Filter:
When you get your filter, you will notice it looks almost black. Because the filter is so dark, you will need to focus your scene before putting the filter on. Once you have your scene in focus, screw your filter on, and then switch to manual focus. You CAN use autofocus with the filter on, but you have to be in broad sunlight for this to work, and it isn’t always accurate….
Lenses focus differently when using an infrared filter. If you want technically sharper results, you can rotate your focus ring about 1 millimeter away infinite symbol (depending on your lens). Some lenses will have an infrared symbol on the lens itself, which is useful. Use that mark if it does. If it doesn’t though, you’ll have to play a little guess-and-check game to find the infrared focusing spot. You CAN use the cameras autofocus, it will just be slightly out of focus (I’ve taken many photos like this anyway.) Try a few test shots using the autofocus, you may find it acceptable. Also try using higher F numbers to increase the depth of field, that might help a little bit.
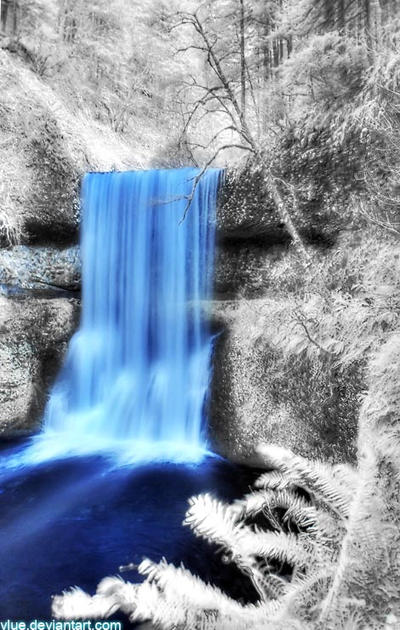
Infrared Photography allows the use of longer shutter speeds.
You also CAN take infrared pictures without using a tripod, but it is not recommended. You will need to use high ISO numbers, and low F numbers, and those usually are not good for landscapes. Just avoid all of that mess by using a tripod. Your photographs will look a lot more professional.
Now, if you haven’t noticed by now, the Hoya R72 filter is DARK. This will substantially increase shutter-speeds. If you need shorter shutter speeds, you can raise the ISO number and lower the F number. I usually don’t do much of that myself, though.
If your photos are coming out too dark, just bump up the EV until you are satisfied. The shutter speeds will be quite long when using the IR filter (depending on how sensitive your camera is to IR).
Setting The White Balance for Infrared Photography:
After taking some photographs with your filter, you may have realized that your pictures are completely RED. In order to fix this, just meter and set the White Balance with your filter on. Google “How to set white balance with [YOUR CAMERA MODEL]” for instructions, if you don’t know how to do this already.
HOWEVER, a lot of cameras cannot set extreme infrared white balances in camera. If you can’t get your camera to work, just shoot in RAW and set the WB later in post processing with a program called UFRAW. This method should work with any camera. UFRAW is way better than Adobe Camera RAW because it can set the white balance for infrared photography which A.C.R. can’t properly do.
Editing IR Photos in Photoshop:
The popular look for infrared photography: have a blue sky instead of brown.

Image on the left is before the red/blue channel swap, image on the right is after it
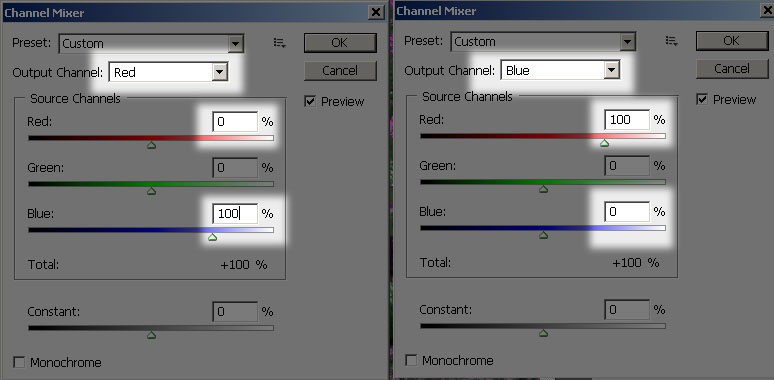
It’s quiet easy to obtain this look. In Photoshop, go to Image > Adjustments > Channel Mixer…. Make sure the “Output channel” is selected on Red inside of the dropdown box. Type in 0 for red, and 100 for blue. Next, select the Blue output channel but selecting it in the drop down box. Type in 100 for Red, and 0 for Blue. You’ve just swapped all the red colors for all the blue ones. Feel free to experiment with other channel swapping variations, I’ve seen pink and yellow foliage before 🙂
If your foliage in your pictures look too red-ish, and you want them pure white like snow, you can easily desaturate them using Image > Adjustments > Hue/Saturation. Select Red (Alt+3) and then slide the saturation slider all the way down to -100.
I would also recommend darkening the levels a little bit. The 2 examples above was not adjusted for that, and it looks a bit faded.
IR Examples Chart:
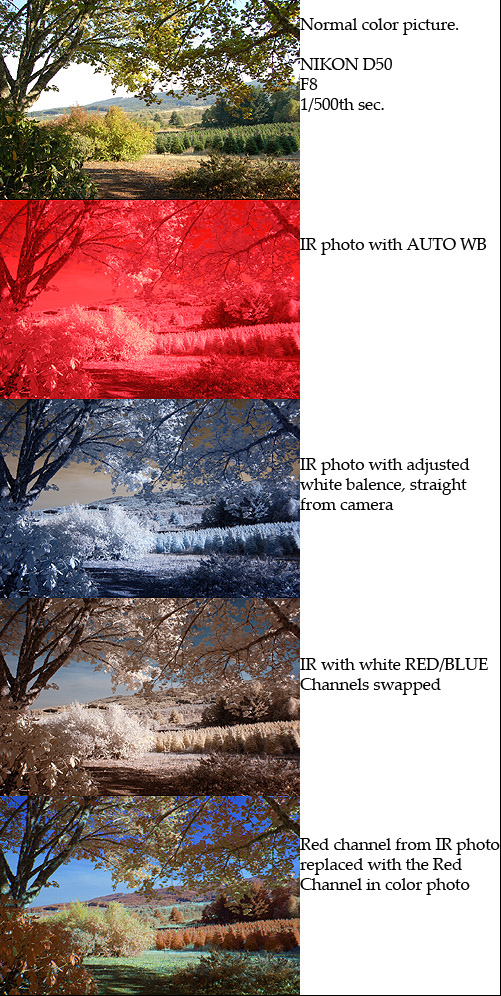
Keep in mind that this was a cloudy day. If it was a pure blue sky, the sky in the IR photos would look much darker.
Editing Infrared RAW Photos in Adobe Camera RAW:
If you want to set the white balance using Adobe products, you can download the DNG Profile Editor and then watch this video tutorial describing how it is done. But, like I said before, I recommend using UFRaw instead of Adobe products.
Using Two Infrared Filters May Get Better Results:
I have access to two Hoya R72 filters. I stacked them on top of each other and used both of them on my lens simultaneously. The results seem to have more color and depth. People seem to debate about this. What do you think?
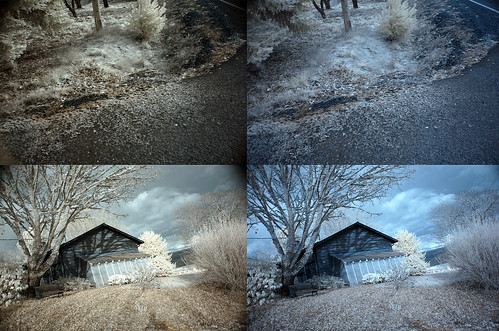
The images on the left was taken with two IR filters stacked on top of each other, and the image on the right was only taken with one. Red/blue channel swapped as well. Nikon D50
Here is the video tutorial that goes along with this article. It isn’t as detailed as the written article, but it has more infrared photo examples that this article doesn’t have:




Pingback: Modifications to the digital camera. « R Tom Sizemore's Blog
Pingback: IR fotografering, hur coolt verkar inte det vara…. « BubbelPLAST
Pingback: Color Infrared Photography Technique Step By Step | HKPhotographer.net
Pingback: CPCA | Blog | La photo en infrarouge (infrared ou souvent appelé IR)
Pingback: My T2i can shoot infrared?